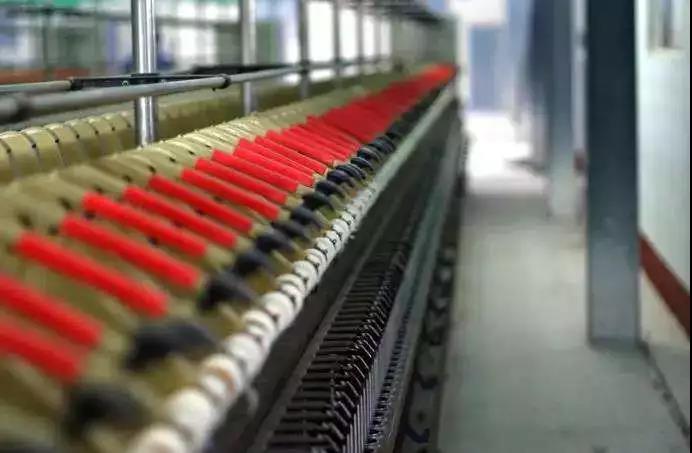
How to deal with the major fabric defects – broken weft in air jet loom?

Iran has imposed a total ban on the import of 1,339 items in 10 categories, with textiles and clothing taking the lead.
2019年3月11日
Production without a plan is futile! How should garment factory make production plan?
2019年3月11日
Yarn pointed tangles or curved broken weft
At the weft tip of the right side of the fabric, there is a slight kink or bend, resulting in short weft and a stop.
Reasons for the formation
(1) the opening is not clear due to slack of side yarn, Hank side yarn, false side yarn or warp yarn defects, flying attachment and other reasons of the right side of cloth edge.
(2) the pressure of the main nozzle is too high, or the installation is not standard.
(3) improper matching between the injection time of the main nozzle and the action time of the electromagnetic needle.
(4) the height and position of the electromagnetic needle are not standard.
(5) air leakage in the compressed air pipeline.
(6) the pressure of the auxiliary nozzle is too low, and the height and Angle are inappropriate.
(7) the left scissors are not sharp.
(8) the left side of the fabric is slack.
(9) the reed surface is not clean, with flying flowers and sundries attached.
(10) the solenoid valve does not work well.
Elimination method
(1) increase the warp tension or remove yarn defects and flying attachment.
(2) reduce the pressure of the main nozzle or adjust the pressure position of the main nozzle.
(3) advance or delay the development time of the electromagnetic needle, and advance or delay the air injection time of the main nozzle to an appropriate time.
(4) inspect and adjust the electromagnetic needle according to timing standards and installation specifications.
(5) regular inspection of compressed air pipelines.
(6) increase the pressure of the auxiliary nozzle and check its height and Angle (depending on the type of filling).
(7) the left side of the scissors must be kept sharp.
(8) the warped warp shall be correctly threaded in healds and reeds.
(9) regularly keep the shaped reed reed surface clean.
(10) press the test key on the control board. If the solenoid valve is found to stop working, check the solenoid valve, such as the solenoid valve working, but it does not work during continuous operation; Check the encoder.
The weft is broken by bending
The u-bend of the weft is due to insufficient filling insertion, poor opening and delayed arrival of the weft. Cause the loom to stop or to form a double defect.
Reasons for the formation
(1) improper injection time of main nozzle and action time of electromagnetic needle.
(2) during shearing, the weft is released from the needle.
(3) air leakage in the compressed air pipeline.
(4) the pressure of the auxiliary nozzle is too low.
(5) the loom is defective in opening, and the warp yarns are defective in hairiness, large knot and flying.
(6) the opening quantity is too small or the opening time is not standard.
(7) the warp yarn touches the tip of the auxiliary nozzle.
(8) the warp tension is too small.
(9) wrong position of main nozzle.
Elimination method
(1) advance or delay the opening time of the electromagnetic needle, and advance or delay the air injection time of the main nozzle.
(2) adjust the action time of the left scissors and the yarn guide to reduce the cutting resistance; Or appropriately increase the shear blow pressure.
(3) check the mechanical valves and air pipes that bend or leak, and adjust or replace them.
(4) appropriately increase the pressure of the auxiliary nozzle.
(5) strictly master the rule that the warp joint is less than 3mm, and remove the large joint, feather yarn and flying flower attachment and other warp defects.
(6) increase the opening quantity, check and adjust the opening time.
(7) move the auxiliary nozzle horizontally by 0.1-0.2 mom, and check the smoothness of the head end of the auxiliary nozzle.
(8) measure and increase the warp tension.
(9) use the main nozzle to regulate its position correctly.
The weft and the left side side warp are twisted to catch the broken weft
The opening time is improperly matched with the flying time of the weft, and the weft is caught by the warp yarns on the left side of the cloth.
Reasons for the formation
(1) improper matching of electromagnetic needle time, main nozzle yarn spraying time and opening time.
(2) the left side of the cloth is slack at the edge of the Hank or other side of the warp.
(3) incorrect installation of main nozzle.
Elimination method
(1) delay the weft from the needle and advance opening time.
(2) correct the tension of Hank and false edge yarns, or correct the opening time.
(3) use the main nozzle for correct adjustment.
Weft and warp caught pattern broken weft
The weft is twisted with the middle warp to form an s-shaped bend. It is mainly caused by the unevenness of the warp tension of the warp piece or the defect of the warp attached to the warp piece.
Reasons for the formation
(1) the warp tension is too small or the tension of the piece yarn is seriously uneven.
(2) warp yarn defects (excessive feathers, large knots, neps, cotton balls, flying attachment, etc.)
(3) too small opening.
(4) bad yarn cutting with left scissors.
Elimination method
(1) measure and increase the tension of the warp yarns, and eliminate factors such as local non-uniform tension.
(2) remove the yarn defects, and the end yarn of the joint shall not exceed 3mm.
(3) increase the opening height appropriately.
(4) adjust the action time of the left scissors and the meshing amount of the blade to make the scissors sharp.
Pick insertion length uneven type of broken weft
The weft yarns introduced into the weft mouth are of different lengths, resulting in long and short weft. It is mainly caused by the instability of weft storage and insufficient weft insertion.
Reasons for the formation
(1) insufficient filling prewinding.
(2) the closing time of the electromagnetic needle is too early.
(3) the main nozzle is blocked by cotton, and the pressure is too low.
(4) bad weft winding shape or improper winding hardness. The weft quality is poor, the yarn has many defects, such as the joint, the flying cotton wool and the waste silk adhesion and so on.
Elimination method
(1) remove flying flowers and check air jet flow.
(2) rewind the yarn correctly.
(3) adjust the pressure according to the prescribed methods and standards.
(4) appropriately increase the pre-winding amount of the weft storage.
(5) delay the closing time of the electromagnetic needle.
(6) increase the pressure of the main nozzle.
(7) remove the lint blocking the components.
(8) change the winding form of the weft yarn, improve the hardness of the weft drum, greatly improve the quality of the weft yarn, and reduce yarn defects.
Broken weft by tip blowing
It is mainly caused by too high air pressure of filling insertion or weak weft knot.
Reasons for the formation
(1) the pressure of the main nozzle is too high.
(2) shear blow is too strong.
(3) the weft yarn is dry and uneven, with many details.
Elimination method
(1) reduce the pressure of the main nozzle.
(2) reduce the shear blow pressure.
(3) replace the weft and take measures to improve the quality of the weft.
The weft is broken by blowing in the middle
The weft insertion force is too strong, the action time is too long or the weft details are blown off within the width of the cloth, which causes the loom to stop or form double sparse defects.
Reasons for the formation
(1) the weft release Angle is too small.
(2) the pressure of the main and auxiliary nozzle is too high, the opening (start and end time) is too large, and the injection Angle of the auxiliary nozzle is too large.
(3) weft yarn has weak details.
Elimination method
(1) increase the release Angle appropriately.
(2) reduce the pressure of the main and auxiliary nozzle, check the filling flight curve, reduce the opening (start and end time), avoid excessive air injection, and reduce the injection Angle of the auxiliary nozzle.
(3) replace the weft and improve the quality of the weft.
The weft is broken at the storage side
In the weft release stop process, the weft insertion force is too strong or the weft yarn has weak details.
Shear fault type weft breakage
The shearing fault broken weft is formed when the weft yarn at the side of the main nozzle has not been cut after filling insertion and before filling insertion.
Reasons for the formation
(1) sharp scissors blade cloth, poor meshing.
(2) poor scissors installation position, cutting time is not standard.
(3) shear blow pressure is too low.
(4) the filling reaches the opposite side later.
Elimination method
(1) grind the blade according to the cycle, and adjust the mesh.
(2) adjust the position according to the scissors installation specifications, and adjust the time.
(3) appropriately reduce the cutting blowing pressure.
(4) increase the pressure of the main and auxiliary nozzle and extend the injection time of the auxiliary nozzle.
Mistakes down
The weft yarn is normal, but due to the abnormal flying of the weft yarn, skein yarn, weft catching yarn, electrical fault and other reasons, no weft yarn arrival signal is sent by mistake, resulting in shutdown.
Reasons for the formation
(1) the weft yarn entering the weft catching edge yarn is abnormal.
(2) the right side of the hemmed yarn is loose.
(3) the filling yarn is not in the correct shape or position of the probe.
(4) there is something wrong with the cable of the weft probe, or the surface of the steel mouth reflection area of the probe is not clean.
(5) the weft probe head has poor sensitivity and the detection board has faults.
(6) improper clearance between feeler and reed.
(7) vibration of shaped reed reed tooth.
Elimination method
(1) adjust the nozzle position to remove the lint and solve the problem of slack filling.
(2) adjust the tension of the edge yarn to make it fit the specification.
(3) adjust the Angle of the last group of auxiliary nozzles, and keep the distance from the weft probe head WWF1 about 50mm.
(4) timely replace the defective weft feeler, and keep the probe and reed clean.
(5) check the sensitivity of the weft detector, so that it does not shut down empty. At the same time, check and replace the weft probe.
(6) adjust the clearance between the feeler and the reed according to the installation specifications.
(7) binding black tape to the reed not only reduces the vibration of the reed, but also prevents the diffusion of the reed jet airflow.